Support our educational content for free when you purchase through links on our site. Learn more
Building a Customized Travel Itinerary Checklist: 12 Steps 🗺️

Building a customized travel itinerary checklist starts with your priorities, then connects bookings, routes, and practical tasks—while leaving enough room for the unexpected. Plan a few daily anchors, group nearby stops, and keep flexible ideas separate from must-dos.
We’ve seen a “quick” detour turn into a four-hour drive once the route went onto the map. That’s the magic of a good itinerary: it catches the hidden travel time before it eats your afternoon, but still leaves space for the little café you didn’t know you were looking for.
Key Takeaways
- Start with your travel style, dates, budget, and must-ses before choosing activities or accommodation.
- Map attractions and group nearby stops to reduce backtracking and spot unrealistic travel days.
- Build in meal breaks, rest, and transit buffers instead of scheduling every minute.
- Book essential, time-sensitive experiences, but keep optional activities flexible.
- Save confirmations, key contacts, and offline directions so your plan stays useful when connectivity doesn’t.
- Treat the itinerary as a guide, not a rulebook: a realistic backup plan makes last-minute changes easier.
Table of Contents
- ⚡️ Quick Tips and Facts
- 🧭 What Is a Customized Travel Itinerary?
- 🗺️ Why Build a Personalized Trip Plan?
- 📝 Before You Plan: Define Your Travel Style and Priorities
- Choose Your Destination, Dates, and Trip Length
- Set a Realistic Travel Budget
- Identify Your Must-Ses, Nice-to-Haves, and Deal-Breakers
- 📚 How Travel Planning Has Changed: From Guidebooks to Digital Itineraries
- 🧰 Travel Itinerary Tools, Apps, and Planning Resources
- Digital Itinerary Planners and Mapping Apps
- Spreadsheets, Notes, and Printable Travel Checklists
- When to Use a Travel Agent or Tour Operator
- ✅ The 12-Step Customized Travel Itinerary Checklist
- 1. Research Your Destination and Local Seasons
- 2. Check Entry Rules, Visas, and Travel Advisories
- 3. Choose Your Arrival and Departure Points
- 4. Book Flights and Other Long-Distance Transport
- 5. Select Accommodation That Fits Your Route
- 6. Group Attractions by Neighborhood or Region
- 7. Estimate Travel Times and Build in Buffer Time
- 8. Schedule Activities, Tours, and Reservations
- 9. Plan Meals, Local Experiences, and Downtime
- 10. Organize Ground Transportation and Navigation
- 11. Prepare a Backup Plan for Weather and Delays
- 12. Share, Save, and Verify Your Final Itinerary
- 📅 How to Build a Day-by-Day Travel Schedule
- Balance Sightseeing, Transit, and Rest
- Plan Around Jet Lag and Arrival-Day Fatigue
- Avoid Overbooking Your Travel Days
- 🚆 Transportation Planning for a Smother Trip
- Flights, Airport Transfers, and Layovers
- Trains, Buses, Rental Cars, and Ferries
- Public Transit, Walking Routes, and Accessibility
- 🏨 Accommodation Planning and Location Strategy
- 💳 Budgeting, Payments, and Booking Details
- 🛂 Travel Documents, Health, and Safety Checklist
- Passports, Visas, and Copies of Important Documents
- Travel Insurance, Medication, and Health Preparations
- Emergency Contacts and Local Safety Information
- 🎒 Packing and Pre-Departure Checklist
- 👨 👩 👧 👦 Customize an Itinerary for Your Travel Group
- Family Travel With Kids
- Solo Travel
- Couples, Friends, and Group Trips
- Accessible and Multigenerational Travel
- 🌿 Responsible, Sustainable, and Culturally Respectful Travel
- 📲 Offline Access, Sharing, and Itinerary Backup
- 🔧 Common Itinerary Planning Mistakes and How to Avoid Them
- 🧾 Custom Travel Itinerary Template and Sample Schedule
- 🔄 How to Update Your Itinerary When Plans Change
- 🏁 Conclusion
- 🔗 Recommended Links
- ❓ FAQ
- How far in advance should I build a travel itinerary?
- How detailed should a customized itinerary be?
- What is the best app for organizing a travel itinerary?
- How many activities should I plan per day?
- Should I book everything before I travel?
- How do I make an itinerary flexible?
- 📖 Reference Links
⚡️ Quick Tips and Facts
A customized travel itinerary checklist is more than a calendar with restaurant pins. It’s a practical plan that connects your priorities, bookings, routes, documents, and backup options, while leaving enough breathing room for the surprise café that steals your afternoon.
If you want to adapt a checklist to your trip from the start, see our guide on how to customize a travel checklist template.
| Quick fact | What it means for your trip |
|---|---|
| Start with the purpose | Pick your top priorities—rest, culture, food, nature, family time, or a mix—before filling the schedule. |
| Map before you book everything | A visual route can expose long transfers and unnecessary backtracking. |
| Plan a few anchors, not every minute | Book the high-demand or time-sensitive experiences; keep other hours flexible. |
| Add realistic travel buffers | Maps estimate routes, but queues, traffic, weather, and missed connections have their own agendas. |
| Keep an offline copy | Save addresses, booking confirmations, and essential instructions somewhere accessible without data. |
| Build a contingency fund | The featured video recommends a 10–20% budget buffer for unexpected expenses; use that as a planning suggestion, not a guarantee. |
| Make the plan usable for everyone | Share the itinerary with companions and clarify who is booking, navigating, and keeping documents handy. |
Our rule of thumb: schedule one or two major anchors per day, then add nearby options if time and energy allow. The featured video suggests four to five must-see spots per day, but that can work only when stops are short and close together. For museum days, family trips, or cities with heavy transit, fewer is usually kinder.
A planning approach that suits one traveler can frustrate another. Some travelers love a detailed spreadsheet; others want a map and three reservations. We’ll build a checklist that accommodates both—and show you where the two approaches meet.
🧭 What Is a Customized Travel Itinerary?
A customized travel itinerary is a trip plan designed around your dates, interests, budget, pace, travel companions, and practical needs. It usually combines a day-by-day outline with the information you’ll need to make each day work.
What belongs in a useful itinerary?
| Itinerary element | Example |
|---|---|
| Trip basics | Dates, time zones, traveler names, emergency contact |
| Bookings | Flights, accommodation, tours, rail tickets, confirmation numbers |
| Daily plan | Activities, reservations, meal ideas, rest periods |
| Route details | Addresses, transit options, estimated travel time |
| Practical notes | Opening hours, accessibility details, dress requirements |
| Checklist items | Documents, medication, packing, pre-departure tasks |
| Plan B | Indoor activity for rain, alternate route, cancellation contact |
An itinerary is not a contract with your future self. Think of it as a trail map: helpful when you want direction, not a reason to ignore a beautiful side path.
Itinerary vs. travel checklist
They work best together, but they solve different problems:
- Itinerary: Where you’ll be, when, and how you’ll get there.
- Checklist: What you need to research, book, bring, confirm, or complete.
- Trip folder: Where the supporting details live, such as tickets and insurance documents.
Apps can combine some of these jobs, but check that the specific features you need are available. For instance, Packr Travel Packing List focuses on packing lists and trip details, while Google Maps is useful for mapping places and routes. Neither removes the need to verify bookings, rules, and opening hours with the original provider.
🗺️ Why Build a Personalized Trip Plan?
A little planning helps answer the unglamorous questions before they become travel-day puzzles: Is the hotel actually near your plans? Does the museum need timed entry? Is that “quick” day trip a four-hour drive each way?
A visual itinerary can also make the trip feel more manageable. Travel writer Christina from Live Like It’s the Weekend describes Google My Maps as “one of the best trip planning tools” she has found, especially for seeing where places sit in relation to one another. That’s a useful perspective, but map pins alone won’t tell you whether a place is open, accessible, or worth a full afternoon—verify those details with official sources.
The biggest benefits
- Less backtracking: Group nearby attractions into the same day.
- Better lodging choices: Compare accommodation locations with your actual plans.
- Fewer missed essentials: Keep document checks, transfers, and reservation details in one place.
- More realistic pacing: Make time for meals, delays, and rest instead of pretending you’re a highly caffeinated robot.
- Easier collaboration: Share responsibilities and trip details with companions.
- More room for spontaneity: When the basics are covered, you can make changes without losing track of what matters.
For trips built around hiking, road trips, or long outdoor days, see our adventure travel checklists. For a lower-cost approach, our budget travel checklists can help turn the budget into an actual planning tool.
📝 Before You Plan: Define Your Travel Style and Priorities
The best itinerary begins with a question that sounds simple but can prevent a surprising amount of spreadsheet drama: What do you want this trip to feel like?
The featured video recommends identifying the trip’s purpose—relaxation, adventure, food, cultural exploration, or a mix—before deciding what to book. We agree. A trip designed for slow beach days shouldn’t quietly turn into a dawn-to-midnight monument sprint.
Choose Your Destination, Dates, and Trip Length
Start with the fixed points:
- Set your travel dates and flexibility. Note work leave, school holidays, event dates, and any dates you cannot move.
- Check seasonality. Research weather, daylight, local holidays, seasonal closures, and peak travel periods. Use official destination sources for current details.
- Decide how many bases make sense. Every hotel change costs time. For a short trip, fewer accommodation moves often mean more time enjoying the destination.
- Check arrival and departure logistics. A late-night arrival or early flight may change which neighborhood makes sense for the first or last night.
- Allow for recovery. Long-haul travel, time-zone changes, and overnight flights can make the first day feel much longer than it looks on paper.
The U.S. Department of State’s country information pages are one useful starting point for international travel guidance. They are not a substitute for checking the destination’s own official entry requirements.
Set a Realistic Travel Budget
Build your budget by category before you compare individual options:
| Category | Questions to answer |
|---|---|
| Transport | Flights, airport transfers, local transit, fuel, parking, tolls |
| Accommodation | Nightly cost, taxes, resort fees, deposits, cancellation terms |
| Food | Groceries, cafés, restaurants, special meals |
| Activities | Tickets, tours, guides, equipment rental |
| Practical essentials | Insurance, connectivity, adapters, medication |
| Buffer | What happens if transport changes or an unexpected expense appears? |
The featured video recommends setting aside a 10–20% buffer for unexpected expenses. Treat this as a helpful planning range from that video, not a universal rule: your buffer should reflect how flexible your bookings are, your destination, and your comfort with risk.
Compare transportation with tools such as Google Flights and Skyscanner, then verify final schedules and baggage policies directly with the carrier. For more cost-conscious trip planning, browse our budget travel checklist collection.
Identify Your Must-Ses, Nice-to-Haves, and Deal-Breakers
Make three short lists:
- Must-ses: Experiences you would be genuinely disappointed to miss.
- Nice-to-haves: Good options if time, weather, and energy cooperate.
- Deal-breakers: Needs such as step-free access, a quiet room, dietary requirements, or a firm spending limit.
Then rank your must-ses. If the first two fill the day, the rest are not “musts”; they’re hopeful extras wearing a convincing hat.
A useful planning trick from Google My Maps users is to distinguish priorities visually. Use a star or a bright color for the top choices and a quieter color for optional ideas. Keep your saved places selective—an enormous map can become a digital junk drawer.
📚 How Travel Planning Has Changed: From Guidebooks to Digital Itineraries
Travel planning has shifted from paper maps and dog-eared guidebooks to shared documents, mobile maps, and apps that organize trip details. Digital tools make it easier to compare routes and share updates, but they also introduce a familiar risk: the plan can become scattered across six apps, three email inboxes, and one screenshot titled “final-final.”
A balanced approach works best
| Planning method | Helpful for | Watch out for |
|---|---|---|
| Paper guidebook or notebook | Offline browsing, focused research, personal notes | Information can age; difficult to update or share |
| Shared document or spreadsheet | Flexible schedules, group coordination, detailed notes | Manual upkeep; can feel cluttered without a clear format |
| Google Maps / My Maps | Visualizing locations, routes, and clusters | Map details and live listings should be verified; offline access varies |
| Trip-planning app | Combining bookings, plans, and travel notes | Features, privacy practices, and device support differ |
| Packing checklist app | Organizing items and packing tasks | Usually not a full replacement for route or booking management |
Live Like It’s the Weekend emphasizes the value of seeing stops on a map; that’s particularly useful for route planning. The first video, linked at #featured-video, emphasizes a loser day-by-day structure, rest, and flexibility. These perspectives are compatible: use a map to understand geography, then build a realistic schedule that leaves room to breathe.
🧰 Travel Itinerary Tools, Apps, and Planning Resources
No single app is the perfect command center for every traveler. Choose tools based on the trip’s actual needs, not the number of colorful icons on the App Store.
Digital Itinerary Planners and Mapping Apps
Google Maps and Google My Maps are useful for saving places, viewing location clusters, and sharing a custom map. My Maps supports layers for organizing places—such as accommodation, food, and activities—but the exact interface and features can change. Check Google’s My Maps help pages for current instructions.
Google Maps is not the same as a confirmed itinerary. A route estimate may not account for a scheduled tour, ticket-entry time, road closure, or the 20 minutes your group spends deciding where to have lunch.
Other helpful options include:
- TripIt for organizing travel confirmations into an itinerary.
- Wanderlog for trip planning, collaborative itineraries, and map-based organization.
- Google Docs or a spreadsheet for a flexible, easily shared plan.
- Packr for packing checklists and related trip preparation on supported Apple devices.
Before committing, check app compatibility, offline access, sharing controls, and privacy details on the relevant official listing.
Spreadsheets, Notes, and Printable Travel Checklists
A spreadsheet is especially useful when you need to compare options side by side. Useful columns include:
| Day/time | Activity or task | Location | Booking or contact | Transit time | Plan B |
|---|---|---|---|---|---|
| Arrival day | Airport transfer | Airport → hotel | Confirmation number | Estimate plus buffer | Taxi or transit alternative |
| Day 1 | Main attraction | Neighborhood | Ticket details | Walk or transit estimate | Nearby indoor option |
| Departure day | Check out and transfer | Hotel → station | Carrier details | Check live conditions | Earlier transfer option |
Keep the document readable on a phone: short rows, clickable map links, and the essential details near the top. For internet-free access, save a copy offline or print a one-page emergency summary.
Travelers who want one simple checklist can also use our digital nomad checklists for longer stays and work trips, or backpacking checklists for trips where bag space and changing plans matter.
When to Use a Travel Agent or Tour Operator
Consider professional help when your trip includes complex connections, multiple countries, specialized activities, or travelers with needs that require careful coordination. A reputable travel advisor can help with logistics and supplier knowledge, but you should still review the itinerary, booking terms, and cancellation conditions yourself.
For tours and activities, compare the operator’s official information with recent customer feedback on platforms such as Tripadvisor or Viator. Reviews can reveal useful patterns, but individual experiences vary. Look for recent, specific comments about meeting points, accessibility, timing, and communication.
✅ The 12-Step Customized Travel Itinerary Checklist
Here’s the core checklist. Work through it in order, but revisit earlier steps when new information changes the plan. Travel planning is less a straight line and more a very polite loop.
1. Research Your Destination and Local Seasons
Check:
- Typical weather for your dates, not only the annual average.
- Seasonal closures, local festivals, public holidays, and peak crowds.
- Whether attractions require timed entry or advance reservations.
- Local customs, dress expectations, and transport norms.
- Official visitor information and current destination guidance.
For outdoor trips, also review the activity provider’s current conditions and safety guidance. Our adventure travel checklists can help you prepare for active itineraries.
2. Check Entry Rules, Visas, and Travel Advisories
Confirm entry requirements using official government sources for your nationality and destination. Requirements can differ by passport, purpose of travel, and length of stay.
- Check passport validity rules.
- Confirm visa or electronic authorization requirements.
- Review destination health and safety guidance.
- Save copies of required documents and application confirmations.
- Recheck requirements close to departure.
For U.S. travelers, start with the U.S. Department of State and the destination government’s official immigration site. Do not rely on an old forum post or a search-result snippet for entry rules.
3. Choose Your Arrival and Departure Points
Compare airports and stations by total journey convenience, not just the advertised fare. A cheaper flight can be less attractive if it adds a long transfer, an overnight stay, or a difficult connection.
Ask:
- Is an open-jaw route—arriving in one city and leaving from another—practical?
- How long does the airport transfer take at your arrival time?
- Do you need to collect luggage and recheck it?
- Does the departure terminal or station require an early arrival?
- Is there a more reliable backup route?
4. Book Flights and Other Long-Distance Transport
Use comparison sites to research, then verify the rules with the airline, rail operator, or bus company before paying. Check:
- Baggage allowances and fees.
- Seat selection and check-in deadlines.
- Change, cancellation, and missed-connection terms.
- Airport or station location.
- Arrival time in local time and date.
For route research, compare Google Flights and Skyscanner. Their results help you compare options; the carrier remains the authoritative source for your ticket conditions and operational updates.
5. Select Accommodation That Fits Your Route
Wait until you understand your main activity areas before choosing a base. A charming hotel can still be inconvenient if every planned stop requires a long commute.
Compare:
- Distance to your highest-priority activities.
- Transit, walking, or parking access.
- Check-in hours and luggage storage.
- Recent reviews, especially comments about noise, cleanliness, and location.
- Cancellation rules and what the booking includes.
Use Booking.com or Airbnb to compare options, then review the property’s own details and recent guest feedback. The featured video also recommends prioritizing a convenient location, reading recent reviews, and checking useful amenities such as breakfast or airport transport.
6. Group Attractions by Neighborhood or Region
Put your places on a map, then cluster them. The goal is not to visit every pin; it’s to reduce wasted transit and spot days that are quietly becoming impossible.
- Add only places that genuinely interest you.
- Use separate categories for activities, food, accommodation, and transport hubs.
- Mark top priorities with a star or distinct color.
- Group nearby places into tentative day clusters.
- Check actual route times and opening hours before assigning dates.
The Live Like It’s the Weekend planning summary shares a useful cautionary example: a visit to Mano del Desierto in northern Chile turned out to be a four-hour, one-way drive from other planned stops. The lesson is not that faraway places are never worth it—it’s that map distance can change an itinerary dramatically once route time is visible.
7. Estimate Travel Times and Build in Buffer Time
Map estimates are starting points, not promises. Add time for:
- Finding the platform or station entrance.
- Waiting for transit and navigating transfers.
- Security, ticket lines, and entry queues.
- Traffic, parking, and walking from a parking area.
- Weather, mobility needs, luggage, or a tired travel group.
For traffic-heavy destinations, avoid stacking distant bookings on the same day. For trains or flights, follow the carrier’s recommended arrival guidance and allow extra time when you have checked luggage or an unfamiliar terminal.
8. Schedule Activities, Tours, and Reservations
Book the elements that are time-sensitive, capacity-limited, or essential to your trip. Leave optional activities flexible where possible.
- Confirm the local time zone and date on every booking.
- Save the provider’s address and contact information.
- Check what is included and what you need to bring.
- Review cancellation and late-arrival rules.
- Add a reminder for the confirmation deadline or ticket release.
Use the official attraction or operator site when available. Third-party booking platforms can be useful, but compare inclusions and terms before you reserve.
9. Plan Meals, Local Experiences, and Downtime
You don’t need a restaurant reservation for every meal. Instead:
- Save a handful of options near each day’s main activities.
- Note dietary needs and likely meal times.
- Reserve special or high-demand meals when necessary.
- Plan for grocery stops or easy meals on arrival days.
- Leave space for rest, wandering, and unplanned discoveries.
The first video puts it neatly: “you can’t go full speed all day.” We’ve learned the hard way that an itinerary with no rest can turn a beautiful city into a sequence of bus stops and snack emergencies. If you’re planning a seaside escape, our beach vacation checklists can help keep beach gear, activities, and the “we’re definitely staying for sunset” plan organized.
10. Organize Ground Transportation and Navigation
Decide how you’ll move between each major stop:
- Public transit, walking, rideshare, taxi, rental car, ferry, or tour transfer.
- How to buy or load local transit tickets.
- Whether a rental car needs advance booking or special documentation.
- Where you’ll park and whether restrictions apply.
- What navigation option you’ll use if your phone has no data.
Save map pins and addresses, and download offline map areas when the service allows it. For rental cars, compare requirements and coverage directly with the rental provider and review local driving rules through official sources.
11. Prepare a Backup Plan for Weather and Delays
For each important day, identify one reasonable alternative:
| If this happens… | Consider this backup |
|---|---|
| Heavy rain | Indoor museum, covered market, or flexible café stop |
| Tour cancellation | Nearby attraction or an unscheduled rest period |
| Transit disruption | Alternative route, taxi stand, or later reservation |
| Low energy | Drop an optional stop and keep the main priority |
| Phone connectivity fails | Printed address and saved confirmation |
A backup plan does not need its own elaborate itinerary. One or two workable alternatives can make a change feel like a decision rather than a crisis.
12. Share, Save, and Verify Your Final Itinerary
Before departure:
- Share the itinerary with everyone who needs it.
- Confirm names, dates, addresses, and time zones.
- Save tickets and confirmations offline.
- Make sure emergency contacts can access the plan.
- Check the latest official guidance and provider updates.
- Keep a short summary available if your main app or account is inaccessible.
If you share a Google My Maps plan, set access deliberately. Give editing access only to people who should change the map, and keep a separate copy of key booking details. A collaborative map is useful; a map that everyone edits at once can become a location-based mystery novel.
📅 How to Build a Day-by-Day Travel Schedule
Once the research is complete, turn your clusters into a schedule. Start with fixed commitments—tickets, check-in, transport—and fit flexible stops around them.
Balance Sightseeing, Transit, and Rest
Try this order:
- Add the day’s most important timed activity.
- Add nearby high-priority places.
- Estimate the route between each stop.
- Add meal and rest windows.
- Mark optional stops as optional.
- Leave a buffer before any booking you cannot miss.
The featured video mentions scheduling major activities while keeping a “lose daily itinerary.” That’s sound advice: an itinerary should tell you what matters, not dictate the precise number of minutes you’re allowed to admire a view.
Plan Around Jet Lag and Arrival-Day Fatigue
For a long journey, keep arrival day light. Plan the transfer, check-in, food, and one gentle activity at most. The first video recommends extra recovery time during the first few days after international travel; how much you need depends on your route, sleep, and personal experience.
Avoid putting a prepaid, hard-to-reach tour immediately after an overnight flight unless you have a strong reason and a backup plan.
Avoid Overbooking Your Travel Days
Four or five stops per day may be possible when they’re quick and close together. It can also be far too many if each involves a long visit, a queue, or a transfer. Ask:
- Does each stop deserve enough time to enjoy it?
- Are the travel legs realistic?
- Is there a meal break?
- Can the day still work if one activity runs late?
- Would you be happy if the last optional stop disappeared?
If the answer to that last question is “absolutely not,” consider moving one must-see to another day.
🚆 Transportation Planning for a Smother Trip
A route can look effortless on a map and become complicated when you add airport terminals, bags, check-in deadlines, and real-world traffic. Plan each transfer as an activity of its own.
Flights, Airport Transfers, and Layovers
- Check the airport’s official website for terminal and transport information.
- Confirm whether your flights are one ticket or separate bookings.
- Allow time for immigration, baggage collection, and recheck where relevant.
- Identify a fallback transfer if your train or shuttle is disrupted.
- Save airline notifications and confirmation details.
For international trips, check current entry and travel information through your government and destination authorities. The U.S. Department of State’s country information pages provide guidance for U.S. travelers.
Trains, Buses, Rental Cars, and Ferries
For every intercity leg, note:
- Departure station or terminal—not just the city.
- Boarding time and ticket conditions.
- Luggage rules and seat reservations.
- Whether connections are protected if a leg is delayed.
- Transfer time from your accommodation to the departure point.
For road trips, map fuel and rest stops, account for driving conditions, and check local road rules. Our backpacking travel checklists are useful for travelers who combine public transport, overnight stays, and changing routes.
Public Transit, Walking Routes, and Accessibility
Check the official local transit site or app for service information, fares, and disruptions. Google Maps can be handy for initial route comparisons, but it may not reflect every live update or accessibility detail.
For travelers who need step-free routes, elevator access, shorter walking distances, or accessible vehicles, contact the transport provider and venue directly. Do not assume a map’s “accessible” label covers every part of the journey.
🏨 Accommodation Planning and Location Strategy
Choose accommodation after you have a rough activity map. This lets you compare neighborhoods by convenience, transport, and fit, not only photos.
| What to compare | Why it matters |
|---|---|
| Location | A central base can reduce daily transit, but “central” depends on your plans |
| Transport links | Useful for early departures and late returns |
| Check-in and luggage storage | Critical on arrival and departure days |
| Recent guest feedback | Look for recurring, specific comments |
| Cancellation terms | Flexibility may matter if transport or plans change |
| Amenities | Breakfast, kitchen, laundry, or airport transfer may save time |
The first video recommends reading recent reviews and checking amenities that suit your plans. We agree, with one caveat: reviews are individual accounts, not guarantees. Look for repeated patterns and compare them with the property’s written policies. Compare Booking.com and Airbnb listings, then confirm the details that affect your stay.
💳 Budgeting, Payments, and Booking Details
Make your itinerary budget actionable. Record what is paid, refundable, due later, or still undecided.
| Booking detail | Track it here |
|---|---|
| Provider | Airline, hotel, tour company, or transport operator |
| Confirmation | Booking reference and relevant contact details |
| Dates and local times | Include time zone where useful |
| Payment status | Paid, deposit due, balance due, or pay on arrival |
| Cancellation terms | Deadline and how to cancel |
| Essential documents | Ticket, voucher, identification, or permit |
Use secure payment practices, and review your bank’s travel and foreign-currency policies before departure. The featured video recommends notifying your bank to reduce the risk of a card being flagged; current bank procedures vary, so check your bank’s official guidance.
For ongoing travel or remote work, our digital nomad checklist collection covers practical planning beyond a single holiday.
🛂 Travel Documents, Health, and Safety Checklist
Keep essential information organized, but don’t store sensitive documents in a public link or a shared folder with broad access.
Passports, Visas, and Copies of Important Documents
- Check passport validity and entry rules through official sources.
- Save booking confirmations and travel documents securely.
- Keep a separate copy of essential information.
- Share emergency details with a trusted person.
- Know how to contact your embassy or consulate when appropriate.
For U.S. travelers, the U.S. Department of State offers destination and emergency guidance. Follow the relevant government authority for your citizenship.
Travel Insurance, Medication, and Health Preparations
Review what your health coverage and travel insurance actually include: medical care, evacuation, trip interruption, baggage, and pre-existing conditions can have different terms. Read the policy documents rather than relying only on a summary.
For destination-specific health advice, use a qualified health professional and official resources such as the CDC Travelers’ Health site. Carry medication in its original packaging when appropriate and confirm destination rules for restricted medicines.
Emergency Contacts and Local Safety Information
Save:
- Local emergency numbers.
- Accommodation and transport contacts.
- Your insurer’s assistance number.
- A trusted person’s contact details.
- Your government’s travel advisory or consular contact information.
Keep important contacts available offline. It’s a small checklist item with a disproportionately large upside.
🎒 Packing and Pre-Departure Checklist
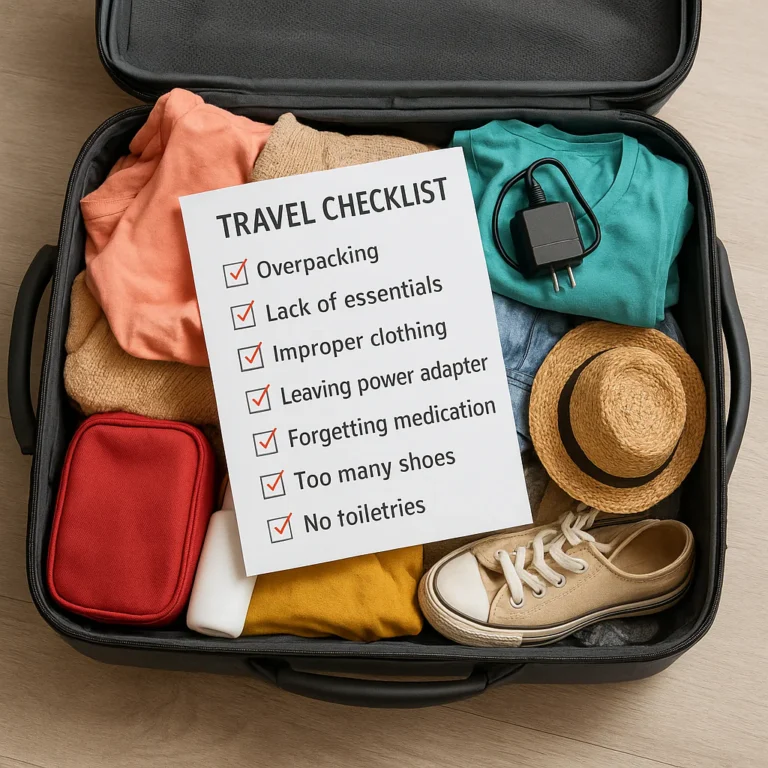
Packing should follow your itinerary, not an imaginary version of your trip in which you attend a formal dinner, hike through snow, and visit the beach every day.
Use the itinerary to identify:
- Weather-specific clothing.
- Activity gear, footwear, or swimwear.
- Chargers, adapters, and connectivity needs.
- Medication and health essentials.
- Documents, tickets, and booking confirmations.
- Laundry access and realistic outfit repeats.
The Packr Travel Packing List app says it can tailor packing lists using trip details such as destination, dates, weather, and activities. Its App Store listing also describes custom lists, reminders, sharing, printing, and offline list access. That makes it a packing companion, not a substitute for checking the itinerary and packing each item yourself.
One reviewer quoted in the listing said the weather information helped them decide what to pack for a beach trip. Another reviewer praised the app and wrote, “Wouldn’t plan any trip without it!!” Reviews are useful signals, not proof that every feature will work perfectly for every traveler or trip.
Before relying on a planning app, check its current App Store listing and compatibility details. Keep your travel documents and booking confirmations in a separate, dependable location too.
👨 👩 👧 👦 Customize an Itinerary for Your Travel Group
A good group itinerary is not the itinerary with the most activities. It’s the one that makes everyone’s needs visible before someone discovers them halfway up a hill.
Family Travel With Kids
- Plan shorter activity blocks and predictable meal breaks.
- Include playgrounds or low-key stops.
- Keep snacks, medication, and a change of clothes accessible.
- Avoid unnecessary hotel changes.
- Save a backup indoor activity for poor weather.
Solo Travel
- Share your accommodation and key transport details with someone you trust.
- Research arrival routes and check-in before booking.
- Keep an offline copy of your plan and emergency contacts.
- Build flexibility into late arrivals and remote activities.
For outdoor-focused trips, browse our adventure travel checklists and adjust them to your route and experience.
Couples, Friends, and Group Trips
Agree on the trip’s priorities and budget before booking nonrefundable activities. Assign clear responsibilities—one person can track reservations, another can research food, and everyone can vote on the “must-see” list.
Use a shared map or document, but name one person to maintain the final version. Collaboration is lovely; duplicate hotel bookings are less so.
Accessible and Multigenerational Travel
Check venue and transport accessibility directly, including:
- Step-free entrances and accessible restrooms.
- Lift availability and service status.
- Seating and rest opportunities.
- Walking distances and surface conditions.
- Accessible room details and transfer options.
Ask precise questions and get confirmation from the provider. Accessibility information can vary in detail, so direct verification is more reliable than assuming a broad label tells the whole story.
🌿 Responsible, Sustainable, and Culturally Respectful Travel
A thoughtful itinerary considers the impact of how and where you travel. When practical:
- Prefer routes that reduce unnecessary transfers.
- Respect local rules for wildlife, sacred places, and photography.
- Support local businesses and follow community guidance.
- Check whether outdoor sites require permits or have seasonal restrictions.
- Avoid overcrowding fragile areas or ignoring closures.
Responsible travel is not a contest in perfect choices. It’s a habit of noticing the people, places, and ecosystems that make the trip possible.
📲 Offline Access, Sharing, and Itinerary Backup
Before departure, test your plan in the conditions you’re likely to face—not only on home Wi-Fi.
- Download offline maps where available.
- Save confirmation emails and tickets for offline access.
- Copy addresses and key instructions into your itinerary.
- Share essential details with your travel group.
- Keep a printed or securely stored emergency summary.
- Check how your app handles syncing and offline changes.
Google’s My Maps help center explains current map features and usage. Offline availability differs between products and content, so test the exact map, file, or document you plan to rely on. Never assume an app’s offline mode includes every linked website or contact detail.
🔧 Common Itinerary Planning Mistakes and How to Avoid Them
| Common mistake | Better approach |
|---|---|
| Planning too many stops | Keep a few daily anchors and label other ideas optional |
| Choosing lodging before mapping activities | Compare locations after you identify the places you’ll actually visit |
| Trusting map distance alone | Check route time, transfers, opening hours, and local conditions |
| Booking every meal and activity | Reserve the essential experiences; preserve flexible time |
| Ignoring arrival-day fatigue | Keep the first day light, especially after a long journey |
| Keeping all information in one app | Save essential confirmations and contacts in a second accessible format |
| Treating reviews as guarantees | Look for recent patterns and verify policies with the provider |
| Forgeting a backup plan | Identify one workable alternative for important outdoor or timed plans |
One caution from the mapping perspective: a faraway pin can look temptingly close on a zoomed-out map. The Mano del Desierto example above shows why you should check real route times before committing. One caution from the day-planning perspective: even a geographically efficient schedule can still be exhausting if it has no meals or rest. Use both checks.
🧾 Custom Travel Itinerary Template and Sample Schedule
Copy this simple structure into a spreadsheet, notes app, or shared document:
| Field | Your details |
|---|---|
| Destination and dates | |
| Traveler names and emergency contact | |
| Arrival and departure details | |
| Accommodation and check-in | |
| Daily must-see | |
| Optional nearby activities | |
| Meal ideas or reservations | |
| Transit route and buffer | |
| Booking references | |
| Plan B | |
| Offline copy saved? |
Sample day: a flexible city itinerary
| Time block | Plan | Notes |
|---|---|---|
| Morning | One timed attraction | Confirm opening hours and entry details |
| Late morning | Nearby walk or optional stop | Skip if the main visit runs long |
| Lunch | Flexible meal near the next area | Keep a few saved options |
| Afternoon | Rest, museum, or neighborhood exploration | Choose based on energy and weather |
| Evening | Reservation or local experience | Leave enough transfer time |
This is a framework, not a prescription. Swap the order around based on opening hours, weather, mobility, and your travel style. For a detailed packing companion, see Packr’s official App Store page; for a location-first plan, use Google My Maps.
🔄 How to Update Your Itinerary When Plans Change
Travel plans change. Flights move, weather arrives sideways, and the museum you planned to visit closes on the one day you’re in town. Keep the plan useful by making edits deliberately:
- Identify what changed. Is it a booking, transport link, weather issue, or a change in energy?
- Protect the fixed commitments. Recheck time-sensitive tickets and connection requirements.
- Rebuild the day around geography. Move nearby optional activities together rather than adding a new cross-city trip.
- Notify your travel group. Make sure everyone sees the latest version.
- Update the backup plan. Remove outdated instructions and save the new details offline.
- Check for downstream effects. A missed train can affect hotel check-in, dinner, and a tour the next morning.
The answer to our opening question—how to plan without turning your holiday into a military operation—is to separate must-do commitments from flexible ideas. Once the essentials are protected, the rest of the itinerary can bend without breaking.