Support our educational content for free when you purchase through links on our site. Learn more
How Often to Update Your Travel Checklist? 🧳

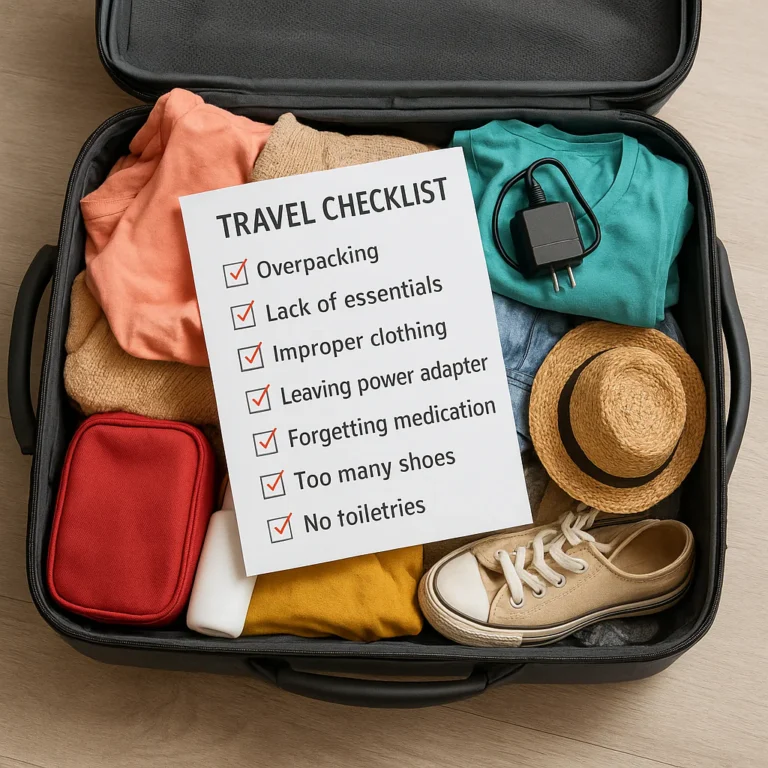
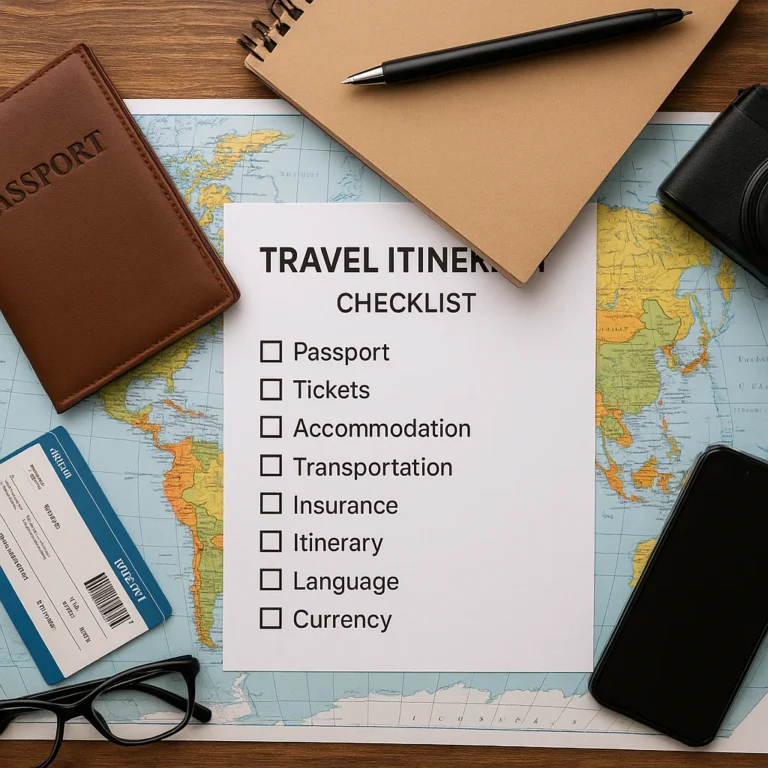
Review your travel checklist after every trip, before each new type of journey, and again before every departure. Do a broader audit at least once a year, and update it sooner when your destination, travel companions, health needs, or plans change.
We learned to treat a checklist as a living document after packing for a city break and discovering our “all-purpose” list had no room for the weather or day-trip plans. The fix wasn’t to pack half the house; it was to make a trip-specific copy and note what we’d change next time.
Key Takeaways
- After every trip, record what you used, missed, carried unnecessarily, or need to replace.
- Before each departure, verify the forecast, bookings, documents, medication, and luggage rules.
- Update for the trip itself: destination, season, activities, travel companions, and accessibility needs can all change what belongs on your list.
- Review time-sensitive rules with official sources. A checklist is a reminder to verify entry requirements, health guidance, and airline policies—not a substitute for current information.
- Keep a master checklist and make a trip-specific copy so useful essentials stay handy without cluttering every journey.
Table of Contents
- ⚡️ Quick Tips and Facts
- 🧭 Why a Travel Checklist Needs Regular Updates
- 🔄 How Often Should You Review and Update Your Travel Checklist?
- 📝 After Every Trip: Capture What Worked and What Didn’t
- 🍂 Seasonally: Refresh Weather-Specific Packing Items
- 🗺️ Before a New Destination or Type of Trip
- 🛂 Before International Travel: Recheck Documents and Entry Rules
- 💉 Before Travel: Verify Health, Medication, and Insurance Details
- 📱 Annually: Audit Apps, Contacts, and Digital Documents
- 🎒 When Your Needs Change: Update for New Travelers or Accessibility Needs
- ⚠️ When Rules or Travel Conditions Change
- 🧳 Before Every Departure: Run a Final Checklist Check
- 🗓️ A Practical Travel Checklist Review Schedule
- The 10-Minute Post-Trip Review
- The Seasonal and Annual Checklist Audit
- The Pre-Departure Review: One Week and One Day Before
- ✈️ What to Review: The Complete Travel Checklist Audit
- 🪪 Travel Documents, Visas, and Identification
- 💳 Money, Cards, and Travel Insurance
- 💊 Health, Prescriptions, and Safety Essentials
- 👕 Clothing, Toiletries, and Packing Lists
- 🔌 Electronics, Apps, and Connectivity
- 🏠 Home, Pet, and Departure-Day Tasks
- 🌦️ Tailor Checklist Updates to the Season, Destination, and Trip Type
- Warm-Weather and Cold-Weather Packing
- City Breaks, Road Trips, Cruises, and Outdoor Adventures
- Carry-On-Only Travel vs. Checked Luggage
- Solo Travel, Family Trips, and Group Travel
- 📋 How to Keep a Travel Checklist Useful, Not Overwhelming
- Use a Master Checklist and Trip-Specific Copies
- Organize Items by Category and Timing
- Remove Duplicates, Outdated Advice, and “Just in Case” Clutter
- Choose a Paper, Spreadsheet, or Travel Checklist App
- 🚫 Common Travel Checklist Update Mistakes
- ❓ Travel Checklist Review FAQs
- Should I update my packing list after every trip?
- How far in advance should I review my travel checklist?
- Do I need a different checklist for every destination?
- How can I keep travel documents and entry requirements current?
- What’s the best way to share a checklist with travel companions?
- ✅ Conclusion
- 🔗 Recommended Links
- 📚 Reference Links
Table of Contents
- ⚡️ Quick Tips and Facts
- 🧭 Why a Travel Checklist Needs Regular Updates
- 🔄 How Often Should You Review and Update Your Travel Checklist?
- 📝 After Every Trip: Capture What Worked and What Didn’t
- 🍂 Seasonally: Refresh Weather-Specific Packing Items
- 🗺️ Before a New Destination or Type of Trip
- 🛂 Before International Travel: Recheck Documents and Entry Rules
- 💉 Before Travel: Verify Health, Medication, and Insurance Details
- 📱 Annually: Audit Apps, Contacts, and Digital Documents
- 🎒 When Your Needs Change: Update for New Travelers or Accessibility Needs
- ⚠️ When Rules or Travel Conditions Change
- 🧳 Before Every Departure: Run a Final Checklist Check
- 🗓️ A Practical Travel Checklist Review Schedule
- The 10-Minute Post-Trip Review
- The Seasonal and Annual Checklist Audit
- The Pre-Departure Review: One Week and One Day Before
- ✈️ What to Review: The Complete Travel Checklist Audit
- 🪪 Travel Documents, Visas, and Identification
- 💳 Money, Cards, and Travel Insurance
- 💊 Health, Prescriptions, and Safety Essentials
- 👕 Clothing, Toiletries, and Packing Lists
- 🔌 Electronics, Apps, and Connectivity
- 🏠 Home, Pet, and Departure-Day Tasks
- 🌦️ Tailor Checklist Updates to the Season, Destination, and Trip Type
- Warm-Weather and Cold-Weather Packing
- City Breaks, Road Trips, Cruises, and Outdoor Adventures
- Carry-On-Only Travel vs. Checked Luggage
- Solo Travel, Family Trips, and Group Travel
- 📋 How to Keep a Travel Checklist Useful, Not Overwhelming
- Use a Master Checklist and Trip-Specific Copies
- Organize Items by Category and Timing
- Remove Duplicates, Outdated Advice, and “Just in Case” Clutter
- Choose a Paper, Spreadsheet, or Travel Checklist App
- 🚫 Common Travel Checklist Update Mistakes
- ❓ Travel Checklist Review FAQs
- Should I update my packing list after every trip?
- How far in advance should I review my travel checklist?
- Do I need a different checklist for every destination?
- How can I keep travel documents and entry requirements current?
- What’s the best way to share a checklist with travel companions?
- ✅ Conclusion
- 🔗 Recommended Links
- 📚 Reference Links
⚡️ Quick Tips and Facts
Review your travel checklist after every trip, at the start of each relevant season, whenever your travel plans or personal needs change, and again before every departure. The packing section may need small edits; documents, entry rules, medication, and safety details deserve a more deliberate check.
For a handy companion list of easy-to-miss essentials, see our guide to often-forgoten items that belong on every travel checklist.
| Review timing | What to check | Why it helps |
|---|---|---|
| After every trip | What you used, missed, damaged, or carried unnecessarily | Turns fresh experience into practical improvements |
| Before a different trip type | Climate, activities, transport, luggage limits, and gear | A beach weekend and a winter trek have different needs |
| Before international travel | Passport validity, visa or entry rules, and local guidance | Requirements vary by destination and can change |
| Seasonally or annually | Gear condition, expiration dates, contacts, apps, and stored documents | Prevents the “I thought this still worked” surprise |
| Before departure | Forecast, reservations, medications, chargers, and final packing | Catches trip-specific changes and last-minute omissions |
A simple rule works well: keep a stable master list, then make a copy for each trip. Avoid rewriting everything for every getaway. Update the reusable list when you learn something that is likely to matter again.
A useful post-trip review asks four questions:
- What did we use?
- What did we carry but never need?
- What did we wish we had?
- What needs repair, replacement, or a fresh expiration-date check?
There’s one important distinction: a checklist is not a source of truth for changing travel rules. Use it to remind you to verify current information with official sources such as the U.S. Department of State travel advisories, the destination’s government, and your airline.
🧭 Why a Travel Checklist Needs Regular Updates
A checklist that worked for last summer’s city break may be a poor fit for a rainy spring road trip. Your destination, itinerary, health needs, luggage allowance, travel companions, and even the apps you rely on can change. The list should change with them.
An outdated checklist can fail in two opposite ways:
- It can leave out essentials. Think of a new medication, a different power adapter, a visa requirement, or warm layers for an unexpectedly cold destination.
- It can accumulate dead weight. That extra outfit, backup gadget, and “maybe useful” item can turn a carry-on into a wrestling match.
Our team learned this the hard way on a trip that mixed city walking with a day outside town. Our usual city list covered comfortable shoes and a phone charger, but not the weatherproof layer we ended up needing. The lesson wasn’t “pack everything.” It was make the list reflect what this trip actually involves.
Travel checklists also serve different purposes. A packing list helps you gather belongings; a departure checklist covers home tasks; a travel-planning checklist tracks bookings and preparation. Keeping those jobs separate makes review faster. For activity-specific templates, browse our adventure travel checklists, backpacking checklists, and beach vacation checklists.
🔄 How Often Should You Review and Update Your Travel Checklist?
There isn’t one magic interval for every traveler. A person taking the same short domestic trip each month may need fewer master-list changes than someone planning a first international trip, traveling with children, or heading into the backcountry.
A practical cadence is:
- After every trip: Record lessons while they’re fresh.
- Before a different destination, season, or activity: Customize the trip copy.
- Before every departure: Verify time-sensitive details and pack against the final itinerary.
- At least annually: Audit gear, apps, contact details, and reusable list content.
- Immediately after a major change: Update the list if plans, health needs, companions, or rules change.
Some checklist advice focuses on reviewing a list every few trips, while other travel-planning guidance recommends revisiting it a few days before departure. These suggestions aren’t really in conflict: review the reusable template periodically; review the specific trip list every time you travel. That way, you avoid needless editing while still catching trip-specific changes.
📝 After Every Trip: Capture What Worked and What Didn’t
Make a brief edit within a day or two of returning, when you still remember what was useful. Don’t turn it into a full travel diary; just note practical improvements.
A fast post-trip audit
- Used and needed: Keep these items on the list.
- Packed but untouched: Consider removing them from the master list or marking them optional.
- Needed but missing: Add them to the relevant category, not a catch-all section.
- Damaged, depleted, or expired: Add a replace, refill, or inspect reminder.
- Trip-specific: Keep it on that trip’s copy unless it will be useful again.
A camping checklist source suggests reviewing gear after each trip and asking what was used, what was unnecessary, what was missing, and what needs repair. That’s useful beyond camping: the questions apply just as well to a road trip power bank or a city-break raincoat. For outdoor itineraries, our adventure travel checklists can help you separate everyday essentials from activity-specific equipment.
Don’t remove an item just because you didn’t use it once. A first-aid item, emergency contact card, or weather layer may be valuable precisely because you didn’t need it. Use judgment, not a ruthless “unused equals useless” rule.
🍂 Seasonally: Refresh Weather-Specific Packing Items
Review seasonal sections when the climate or activity changes, not just when the calendar flips. Seasons differ across hemispheres, elevations, and regions; “summer clothes” are not a reliable forecast.
Check:
- Typical and forecast temperatures, including overnight lows
- Rain, wind, snow, humidity, and sun exposure
- Appropriate footwear and outer layers
- Hydration and sun protection
- Seasonal activity equipment
- Whether storage items are clean, dry, functional, and ready to go
For a beach trip, your list may need sun protection and water-ready items; for a mountain trip, it may need layers and weatherproof gear. Use our beach vacation checklists or backpacking checklists as a starting point, then tailor them to the actual forecast and itinerary.
🗺️ Before a New Destination or Type of Trip
Create a trip-specific copy whenever the logistics change substantially. A checklist for a familiar domestic weekend may not cover an overseas trip, a cruise, a camping trip, or a trip with a rental car.
Before you customize it, identify:
- Where you’re going: Country, region, city, and any remote stops.
- What you’ll do: Walking tours, swimming, hiking, business meetings, or other activities.
- How you’ll get around: Plane, train, rental car, ferry, or a mix.
- What you can bring: Airline baggage limits, accommodation facilities, and storage space.
- Who is traveling: Adults, children, older relatives, or people with particular access or medical needs.
A camper’s practical advice, shared in a camping checklist article, is to keep learning from each outing: add items that prove useful and stop bringing things that repeatedly go unused. That’s a good principle, provided you keep essential emergency and safety items even when you hope not to use them.
🛂 Before International Travel: Recheck Documents and Entry Rules
Check international requirements early, then verify them again close to departure. Passport validity rules, visa requirements, transit conditions, and entry procedures depend on your nationality and destination. A saved note from a previous trip can become stale.
Use this order:
- Confirm the passport validity requirement with the destination’s official government or embassy.
- Check visa and transit requirements using official government information.
- Review current travel advisories from your government.
- Confirm airline document requirements and any required travel forms.
- Save copies of essential documents securely, while keeping originals protected.
For U.S. travelers, the U.S. Department of State’s country information pages provide destination-specific information. If you’re traveling from elsewhere, consult your own foreign ministry and the destination government. Do not rely on an old checklist, a search snippet, or a social-media post as the final authority on entry rules.
💉 Before Travel: Verify Health, Medication, and Insurance Details
Health preparation can be destination- and traveler-specific, so update this section before each trip. Check your prescription supply, medication storage needs, and whether you should speak with a healthcare professional about travel-related precautions.
Useful reminders may include:
- Bring prescribed medication in its original packaging where practical, and check rules for controlled or restricted medicines.
- Pack enough medication for the trip, with a reasonable buffer if your clinician or travel circumstances support it.
- Record generic medication names and relevant medical information.
- Confirm travel insurance coverage, exclusions, emergency contacts, and claims instructions.
- Check destination health recommendations through a qualified source such as the CDC Travelers’ Health destination pages.
The CDC advises travelers to consult destination-specific health information and seek medical advice when appropriate. A general checklist is a reminder, not personal medical advice. For health questions, talk with a clinician or travel-health professional.
📱 Annually: Audit Apps, Contacts, and Digital Documents
At least once a year, make sure the digital side of your checklist still works. That includes not only the app itself, but also the information you’ve saved in it.
Review:
- Emergency contacts and trusted trip contacts
- Expired insurance cards or document scans
- Offline access to maps, tickets, and reservations
- Account access, backups, and device syncing
- Old packing templates and duplicate lists
- App permissions and notification settings
If a checklist app stores sensitive information, consider what you’re saving there. A packing list is low-risk; passport scans, medical details, and account credentials deserve more careful handling. Keep a secure backup, use a strong device passcode, and avoid storing passwords in plain text.
🎒 When Your Needs Change: Update for New Travelers or Accessibility Needs
Update your list as soon as your circumstances change—not just at the next annual review. A new travel companion, mobility aid, dietary need, medication routine, or work requirement can change what you need to prepare.
Examples include:
- Adding child-specific items, comfort objects, or feeding supplies
- Planning for mobility aids, accessible transport, or additional transfer time
- Including assistive technology and charging equipment
- Tracking dietary requirements and relevant translation cards
- Adding remote-work equipment for a longer stay
- Sharing responsibilities among group members
For longer trips that combine work and travel, see our digital nomad checklists. For group travel, assign owners to shared tasks; “someone will pack the first-aid kit” is not a plan unless someone’s name is next to it.
⚠️ When Rules or Travel Conditions Change
Update your trip checklist promptly when any major detail changes:
- Flight, hotel, or transport plans
- Weather forecast or severe-weather alerts
- Entry or transit requirements
- Airline baggage rules
- Activity bookings or equipment needs
- Health or accessibility needs
- Local disruptions or safety advisories
A daily checklist article recommends reviewing task lists more often when circumstances change quickly and refreshing them after major changes. That idea transfers neatly to travel: the more dynamic the trip, the more frequently you should check the trip-specific list. For stable plans, a few scheduled reviews may be enough; for a disrupted itinerary, check updates as they happen.
🧳 Before Every Departure: Run a Final Checklist Check
The final check is not the time to reinvent your master list. It’s the time to compare the trip copy against reality.
- Recheck the forecast and planned activities.
- Confirm reservation details and transport arrangements.
- Verify documents, medication, chargers, and essential items.
- Check luggage limits and what must go in your personal item.
- Confirm home, pet, and mail arrangements.
- Put time-sensitive items—passport, wallet, keys, medication—on a short “grab before leaving” list.
A step-by-step video checklist for preparing before a trip uses a staged approach: handle longer-lead items earlier, then confirm documents, chargers, home arrangements, and day-of essentials near departure. The useful takeaway is the timing, not copying every task mechanically: adapt the schedule to your destination and personal circumstances.
🗓️ A Practical Travel Checklist Review Schedule
Use this schedule as a starting point. A complex international or outdoor trip may need more lead time; a familiar weekend away may need less. Time-sensitive requirements should always be checked against current official guidance.
| When | Review focus | Example action |
|---|---|---|
| As soon as plans are booked | Destination, trip type, documents, health preparation | Start a trip-specific checklist and flag long-lead items |
| About a month ahead, when relevant | Passport, visa, vaccines, insurance, equipment | Confirm requirements and arrange items that take time |
| About a week ahead | Forecast, reservations, packing, home arrangements | Adjust clothing and confirm bookings |
| A few days ahead | Documents, transport, itinerary, device charging plan | Store confirmations offline and share itinerary |
| The day before and day of | Personal item, medications, keys, final home tasks | Use a short grab-and-go check |
| After returning | What worked, what was missing, what needs attention | Update the master list while details are fresh |
The 10-Minute Post-Trip Review
Set a short timer and work through these steps:
- Open the trip copy. Don’t edit the reusable master list blindly.
- Mark what you used. Note items that were essential, useful, or unnecessary.
- Record one or two surprises. Was there a missing adapter, unexpected rain, or a reservation detail you needed offline?
- Check condition and supplies. Note laundry, repairs, replacements, and refill needs.
- Promote reusable lessons. Add only changes that will help on future trips.
- Archive the trip copy. Keep it if you want a record, but don’t let old lists crowd the active template.
This keeps post-trip edits practical instead of turning every vacation into a referendum on your entire packing strategy.
The Seasonal and Annual Checklist Audit
A seasonal review focuses on relevant clothing and equipment. An annual review looks at the whole system.
Seasonal check
- Replace climate-specific items for the next trip.
- Test seasonal gear before you need it.
- Check batteries, seals, straps, and stored equipment.
- Update activity templates if your plans have changed.
Annual check
- Remove outdated recommendations and duplicate entries.
- Check expiry dates on relevant supplies and documents.
- Verify contacts, apps, and saved links.
- Review what repeatedly goes unused.
- Check whether your luggage, devices, and travel habits have changed.
For outdoor trips, inspect gear before the season starts rather than discovering a broken buckle in the parking lot. Our backpacking checklists can help you sort equipment by function and trip conditions.
The Pre-Departure Review: One Week and One Day Before
About a week before: Check weather, reservations, transport, baggage rules, and activity-specific items. Begin gathering non-daily essentials, but leave frequently used items on the list so they don’t get packed too early.
A day or two before: Confirm documents, medication, charging equipment, accommodation details, and itinerary access. Download tickets, maps, or confirmations if you may be without reliable internet.
On departure day: Use a short final list for items that can’t be packed earlier: phone, wallet, keys, passport where needed, glasses, daily medication, and anything still charging.
A video preparation guide recommends spreading tasks across the month, week, final days, and departure day. That staged approach is sensible because it separates tasks with long lead times from last-minute essentials. But don’t treat its timing as universal: your destination, airline, health needs, and travel arrangements may require earlier action.
✈️ What to Review: The Complete Travel Checklist Audit
Review the list in categories, then check whether each item belongs on the master list, the trip-specific list, or neither. A clear category is more useful than a giant “miscellaneous” bucket that becomes the junk drawer of travel planning.
🪪 Travel Documents, Visas, and Identification
Check:
- Passport or national ID validity
- Visa and transit requirements
- Driver’s license and any required permits
- Boarding passes, tickets, and reservation details
- Insurance documents and emergency contacts
- Secure digital copies and offline access
Verify requirements with official sources, including the U.S. State Department for U.S. travelers, and the relevant government authority for your nationality and destination. A document checklist can remind you to check; it cannot determine your eligibility to enter a country.
💳 Money, Cards, and Travel Insurance
Before departure, review:
- Payment cards and backup payment options
- Bank contact details and card-freeze instructions
- Local currency needs and cash-access plans
- Upcoming bills or payments
- Travel insurance coverage and emergency procedures
- Whether your policy fits planned activities and destinations
Don’t assume every policy covers every activity, disruption, or medical situation. Read the policy details and contact the provider if you need clarification. For budget planning reminders, our budget travel checklists offer a useful place to start.
💊 Health, Prescriptions, and Safety Essentials
Review medication and health items before each trip, especially when traveling internationally or staying away for an extended period. Confirm that supplies, storage, and documentation suit your needs.
Depending on the trip, your list may include:
- Prescription medication and necessary medical devices
- A basic first-aid kit
- Relevant medical or allergy information
- Sun protection and insect protection where appropriate
- Emergency contacts and local emergency information
- Activity-specific safety equipment
Use current destination health guidance from the CDC Travelers’ Health site and seek professional advice for individual health decisions. A first-aid kit should fit the activities and destination; it isn’t a substitute for training or emergency care.
👕 Clothing, Toiletries, and Packing Lists
Match clothing to the forecast, itinerary, laundry access, and local expectations. Start with outfits or clothing functions, not a long list of individual “just in case” garments.
Ask:
- Will I walk a lot, attend formal events, swim, or spend time outdoors?
- Can I do laundry?
- What are the likely daytime and nighttime conditions?
- Do I need specialty footwear or layers?
- Are toiletries available at my accommodation, and are there restrictions on what I can carry?
For carry-on packing, check your airline’s current baggage and security guidance. Requirements can vary by airline, route, and airport, so old notes may not apply.
🔌 Electronics, Apps, and Connectivity
Review the devices you will actually use and the accessories they need:
- Phone, charger, and charging cable
- Power bank, if appropriate for your travel mode and airline rules
- Camera or work devices
- Headphones and adapters
- Offline maps, tickets, and reservation details
- Backup access to important contacts and documents
Confirm that your charging equipment is compatible with the destination and that your essential files are available without an internet connection. For remote work or longer stays, use our digital nomad checklists to separate work gear from vacation essentials.
🏠 Home, Pet, and Departure-Day Tasks
A travel checklist should cover the place you’re leaving, not just the bag you’re taking.
- Arrange pet care, plant care, and mail handling as needed.
- Share key home instructions with a trusted person.
- Secure doors and windows.
- Take out trash and handle perishables.
- Unplug only appliances that are safe and appropriate to unplug.
- Confirm your ride or transport plan.
- Keep keys, wallet, phone, and essential documents accessible.
Assign shared responsibilities by name. “Check the house” is vague; “Sam confirms the pet sitter and locks the back door” is actionable.
🌦️ Tailor Checklist Updates to the Season, Destination, and Trip Type
A reusable checklist saves time, but the trip copy needs to reflect the trip. Use this comparison to decide which parts deserve a refresh:
| Trip style | Checklist emphasis | Common review prompt |
|---|---|---|
| City break | Walking comfort, weather layers, tickets, daily essentials | How much walking and what indoor activities are planned? |
| Road trip | Driver documents, route access, vehicle needs, snacks, stops | What should be reachable during the drive? |
| Beach vacation | Sun and water protection, swimwear, wet-item storage | What is provided at the accommodation? |
| Backpacking | Weight, weather protection, navigation, food and water plan | Is each item necessary and suitable for conditions? |
| Business trip | Work devices, meeting materials, appropriate clothing | What must be ready for the first meeting? |
| Family trip | Shared supplies, child-specific needs, backup routines | Who is responsible for each shared item? |
Warm-Weather and Cold-Weather Packing
Don’t review seasonal packing by temperature alone. Rain, wind, sun exposure, elevation, and nighttime conditions matter too.
Warm or humid conditions
Review lightweight clothing, water access, sun protection, insect protection, and storage for wet gear. Choose items based on your activities and the destination’s conditions, not just the word “tropical.”
Cold or changeable conditions
Review warm layers, weather-resistant outerwear, suitable footwear, and equipment appropriate to your activity. For remote or technical outdoor travel, consult qualified local guidance and use equipment suited to the conditions. Our adventure travel checklists can help structure an activity-specific list.
City Breaks, Road Trips, Cruises, and Outdoor Adventures
Each trip type changes the practical details worth reviewing:
- City break: Walking distances, transit access, timed tickets, and comfortable shoes.
- Road trip: Driver documents, route information, vehicle readiness, and roadside arrangements.
- Cruise: Port-day plans, boarding documents, and the cruise line’s current requirements.
- Outdoor adventure: Activity-specific gear, weather checks, route plans, and emergency communication.
- Beach trip: Sun protection, water activities, and where to keep wet or sandy items.
Use the checklist as a prompt to verify current operator and destination guidance. For a trip that combines several styles, make separate sections rather than choosing one label and hoping it covers everything.
Carry-On-Only Travel vs. Checked Luggage
Your luggage strategy should affect the list itself:
| Carry-on focus | Checked-luggage focus |
|---|---|
| Keep essential documents, medication, valuables, and key devices accessible | Separate essentials in case checked bags are delayed |
| Follow current airline and airport restrictions | Check baggage allowance, size, weight, and special-item rules |
| Prioritize versatile clothing and compact toiletries | Protect fragile or weather-sensitive items appropriately |
| Plan for limited liquid and storage capacity | Use identifying labels and keep a basic arrival kit in your personal item |
Check current official TSA guidance for U.S. airport screening and your airline’s rules for the specific route. Security rules and airline baggage policies are not interchangeable, and international airports may have different procedures.
Solo Travel, Family Trips, and Group Travel
The more people involved, the more useful clear ownership becomes.
- For solo travel, review emergency contacts, itinerary sharing, and backup access to key information.
- For families, create age-appropriate sections and account for individual medication, comfort, and care needs.
- For groups, label shared gear and assign a person to each task.
- For accessible travel, confirm transport and accommodation arrangements directly with providers and include required mobility or assistive equipment.
For digital collaboration, shared checklists can prevent four people from packing the same card game while nobody brings the charging cable. Keep sensitive personal details out of a shared list unless everyone agrees and the storage method is appropriate.
📋 How to Keep a Travel Checklist Useful, Not Overwhelming
A useful checklist makes decisions easier. If every trip requires scrolling through a hundred irrelevant items, the list is asking for its own vacation.
Use a Master Checklist and Trip-Specific Copies
Keep one reusable master list, then duplicate it for each trip. This preserves useful lessons without forcing every traveler to repeat the same edits.
A clean structure might look like this:
- Master list: Common essentials and recurring reminders.
- Trip copy: Destination, dates, activities, and traveler-specific needs.
- Archived trips: Completed lists kept for reference, not mixed with active tasks.
A travel-planning article recommends refining a reusable list and adapting a copy to each trip. That’s the right balance: reuse the framework, not assumptions about the destination.
Organize Items by Category and Timing
Use categories that match how you prepare:
- Documents and bookings
- Clothing and footwear
- Toiletries and health
- Electronics
- Activity gear
- Home and pet care
- Departure-day essentials
Then group tasks by timing: early planning, week before, final days, and departure day. “Check passport validity” belongs well before “put passport in personal item.” Both matter, but they don’t happen at the same time.
Remove Duplicates, Outdated Advice, and “Just in Case” Clutter
During reviews, ask whether each line is:
- Still relevant?
- Specific enough to act on?
- Already covered elsewhere?
- Better as an optional or destination-specific item?
- A reminder to verify current information rather than a fixed rule?
Avoid deleting sensible emergency essentials just because they were unused. Instead, distinguish between risk-management items and comfort extras. You may not need every extra outfit; you may still want to carry a basic first-aid item appropriate to your trip.
Choose a Paper, Spreadsheet, or Travel Checklist App
Pick the format you’ll actually open and maintain.
| Format | Strengths | Trade-offs |
|---|---|---|
| Paper list | Simple, visible, works without power | Harder to reuse, share, or update across devices |
| Spreadsheet | Flexible, sortable, easy to duplicate | Can feel cumbersome on a phone |
| Checklist app | Convenient updates, categories, reminders, and sharing may be available | Features vary; check offline access, privacy, and device compatibility |
A checklist app can make updates easier, especially when you travel often or coordinate with others. Before choosing one, confirm that it supports your preferred workflow and that the information you store is appropriate for the service. No app can verify every visa rule, airline policy, or health recommendation for you; it helps you remember to check.
🚫 Common Travel Checklist Update Mistakes
Avoid these familiar traps:
- Updating only after something goes wrong: Add useful lessons after every trip, not just dramatic ones.
- Using the same list for every trip: A city weekend, international visit, and backpacking trip need different checks.
- Trusting old entry or airline details: Recheck requirements with official sources.
- Putting everything in one long list: Separate planning, packing, home tasks, and departure-day items.
- Removing all unused items: Some health and safety items are there for contingencies.
- Adding every possible item: A longer list is not automatically a safer or better list.
- Forgetting expiration dates and gear condition: A checklist cannot help if the item no longer works.
- Leaving shared tasks unassigned: Name the person responsible.
- Checking the forecast once and never again: Conditions can change; revisit close to departure.
- Storing sensitive information carelessly: Treat identity and medical details with appropriate security.
One competitor article claims that 80% of camping gear failures result from outdated checklists. We could not verify that statistic from a reliable primary source, so we do not recommend repeating it as an established fact. The underlying point is still sound: inspect equipment and update your list, but rely on verifiable guidance rather than a striking unsupported percentage.
❓ Travel Checklist Review FAQs

Should I update my packing list after every trip?
Yes, make a quick review after each trip, but only carry lasting lessons into your master list. Record what you used, what was missing, what you carried unnecessarily, and what needs repair or replenishment. Keep one-off items on the trip copy unless they are likely to help again.
Don’t delete a useful safety item just because it stayed packed. The goal is a more relevant list, not the shortest list possible.
Read more about “12 Top Destinations for Milestone Trips 🎉”
How far in advance should I review my travel checklist?
Start as soon as your plans are firm enough to reveal long-lead needs. For international travel, medical preparation, special equipment, or complex itineraries, check requirements early. Then review the trip list about a week before departure and again in the final days.
The right schedule depends on the trip. A familiar weekend may need only a brief preparation window; a new international route or remote adventure deserves more lead time. Verify official requirements directly and revisit weather and operator guidance closer to departure.
Read more about “Can a Travel Checklist App Reduce Stress? ✅”
Do I need a different checklist for every destination?
You usually don’t need to create a brand-new checklist from scratch. Keep a master list and make a destination-specific copy. Add or remove items based on climate, activities, transport, accommodation, entry requirements, and traveler needs.
A different trip type may justify a separate template—for example, one for backpacking and another for city breaks. Browse our backpacking checklists and budget travel checklists for ideas you can adapt.
Read more about “13 Travel Checklist Mistakes That Can Derail Your Trip 🧳”
How can I keep travel documents and entry requirements current?
Treat your checklist as a reminder, not as the authority. Before each international trip, confirm document validity, visas, transit conditions, and entry rules through official government sources for your nationality and destination. Check airline requirements separately, and confirm details again near departure if your plans or guidance change.
Keep copies securely accessible, but protect sensitive documents. A saved checklist item such as “verify entry requirements” stays useful; a fixed note about a rule may become outdated.
What’s the best way to share a checklist with travel companions?
Use a shared list or document that allows clear ownership, and assign each shared task to one person. Separate group supplies from personal packing, and agree on when the list will be reviewed.
Share only information companions need. Sensitive medical, identity, or financial details should be handled thoughtfully and stored securely. For complex trips, divide the list into categories such as transport, accommodation, food, shared gear, and individual essentials.
Read more about “📱 15 Travel Checklist App Features for Easy On-the-Go Use”
How can a travel checklist app help me stay organized?
A checklist app can make it easier to duplicate lists, group tasks, set reminders, and share responsibilities. The biggest benefit is not a dazzling feature; it’s having the right reminder appear at the right time, instead of rediscovering an expired document at the airport.
Before relying on an app, check whether it supports offline access, backups, collaboration, and the privacy controls you need. Keep an independent way to access critical documents and bookings, and continue verifying changing travel requirements with official sources.
Read more about “🌍 How to Prepare for an International Trip: The Ultimate 12-Step Guide (2026)”